Sign form or form record/Remove signature
In the EDC app, from the DATA ENTRY tab, you can sign or remove the signature from the case report form (CRF) belonging to a certain subject and visit or an individual record in the log form. Usually, the form signature is the responsibility of the principal investigator (PI) of the site, required to ensure that the entered data and changes made to the form are accurate. A form without a signature usually indicates that it is currently undergoing a development phase, and changes can still be made to it. Based on the study and site-level setting for the PI signature, the signed form can or cannot be amended, so there can be cases when the signature needs to be temporarily removed to introduce some eligible changes.
Important
A form can only be signed or the signature removed when it adheres to the conditions for the PI signature set at the study or at the site level in the STUDY INFO module.
For the subjects whose site was changed, the PI of the current site cannot sign the forms and records already signed by the PI of the previous site.
-
In the EDC application header, select the DATA ENTRY tab.
-
On the site list page that opens, select the tile representing the site with which you want to work.
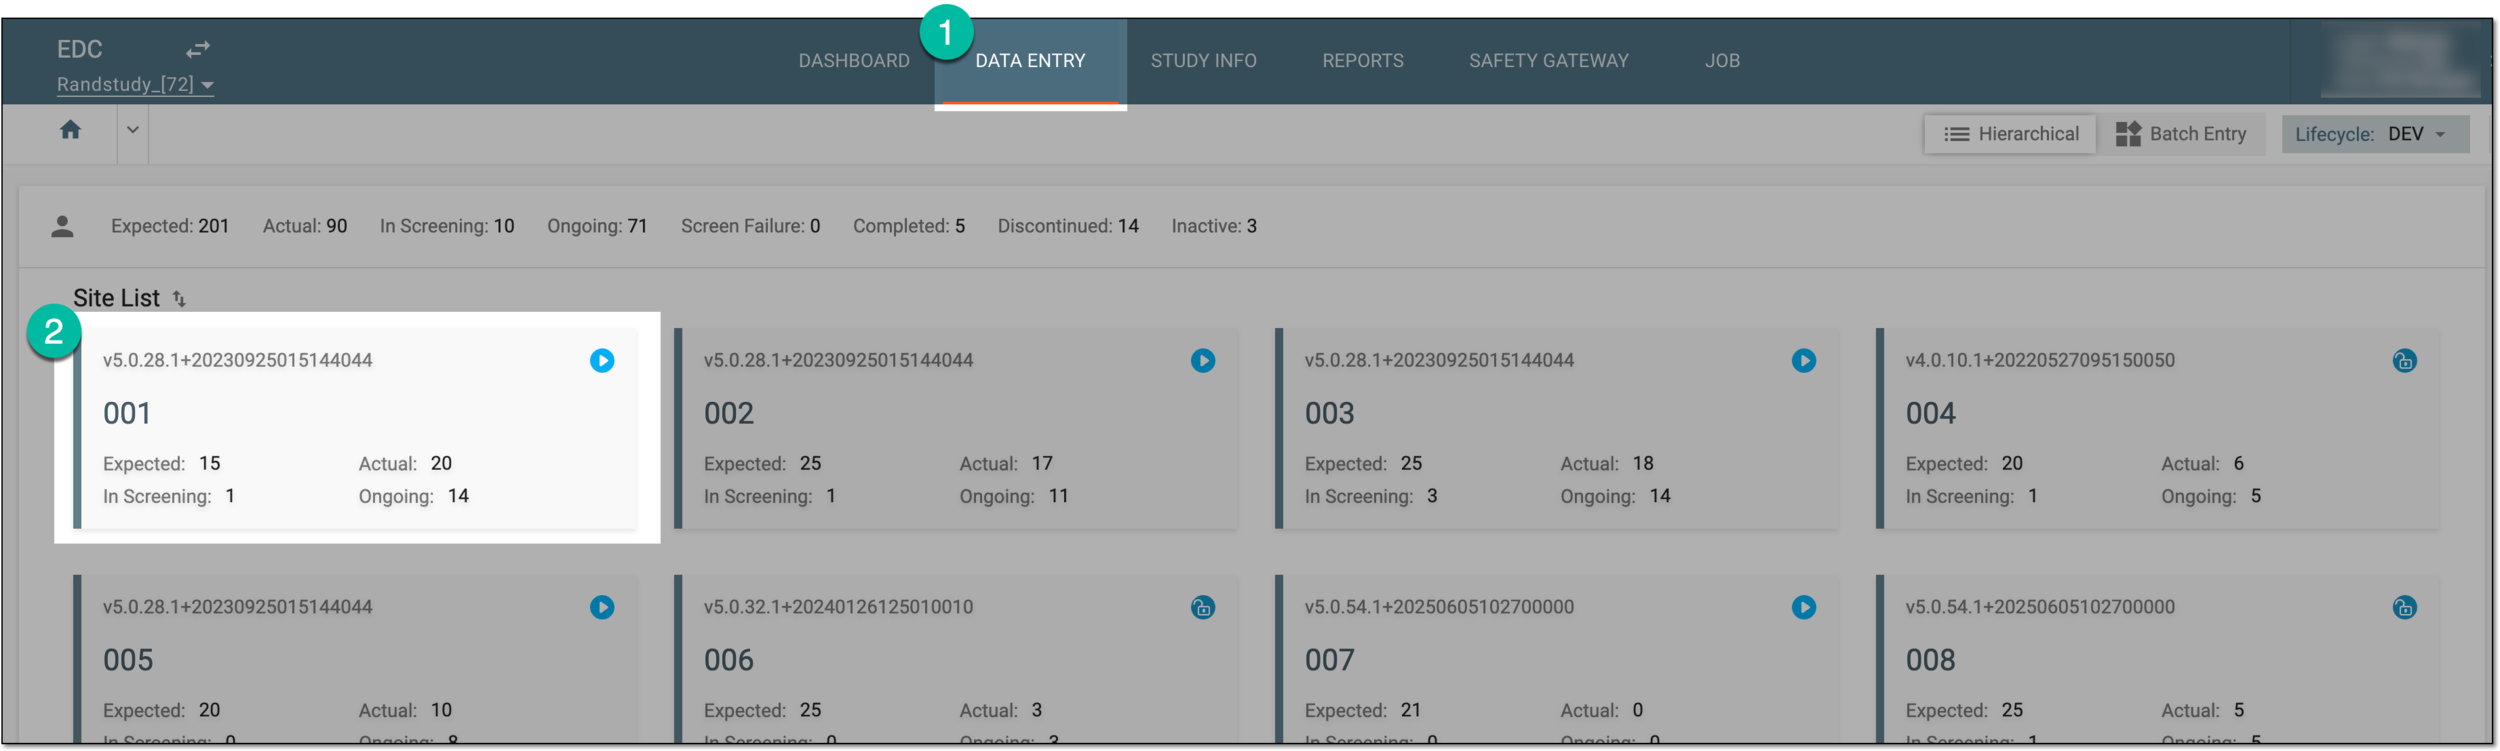 Figure 1. Selecting site tile
-
In the Subject List table that appears, select the ID of the subject to open their Visit Overview page.
 Figure 2. Selecting subject ID
-
On the Visit Overview page that opens, on the left, a panel with all subject visits is displayed. Expand the needed visit to open the forms associated with that visit.
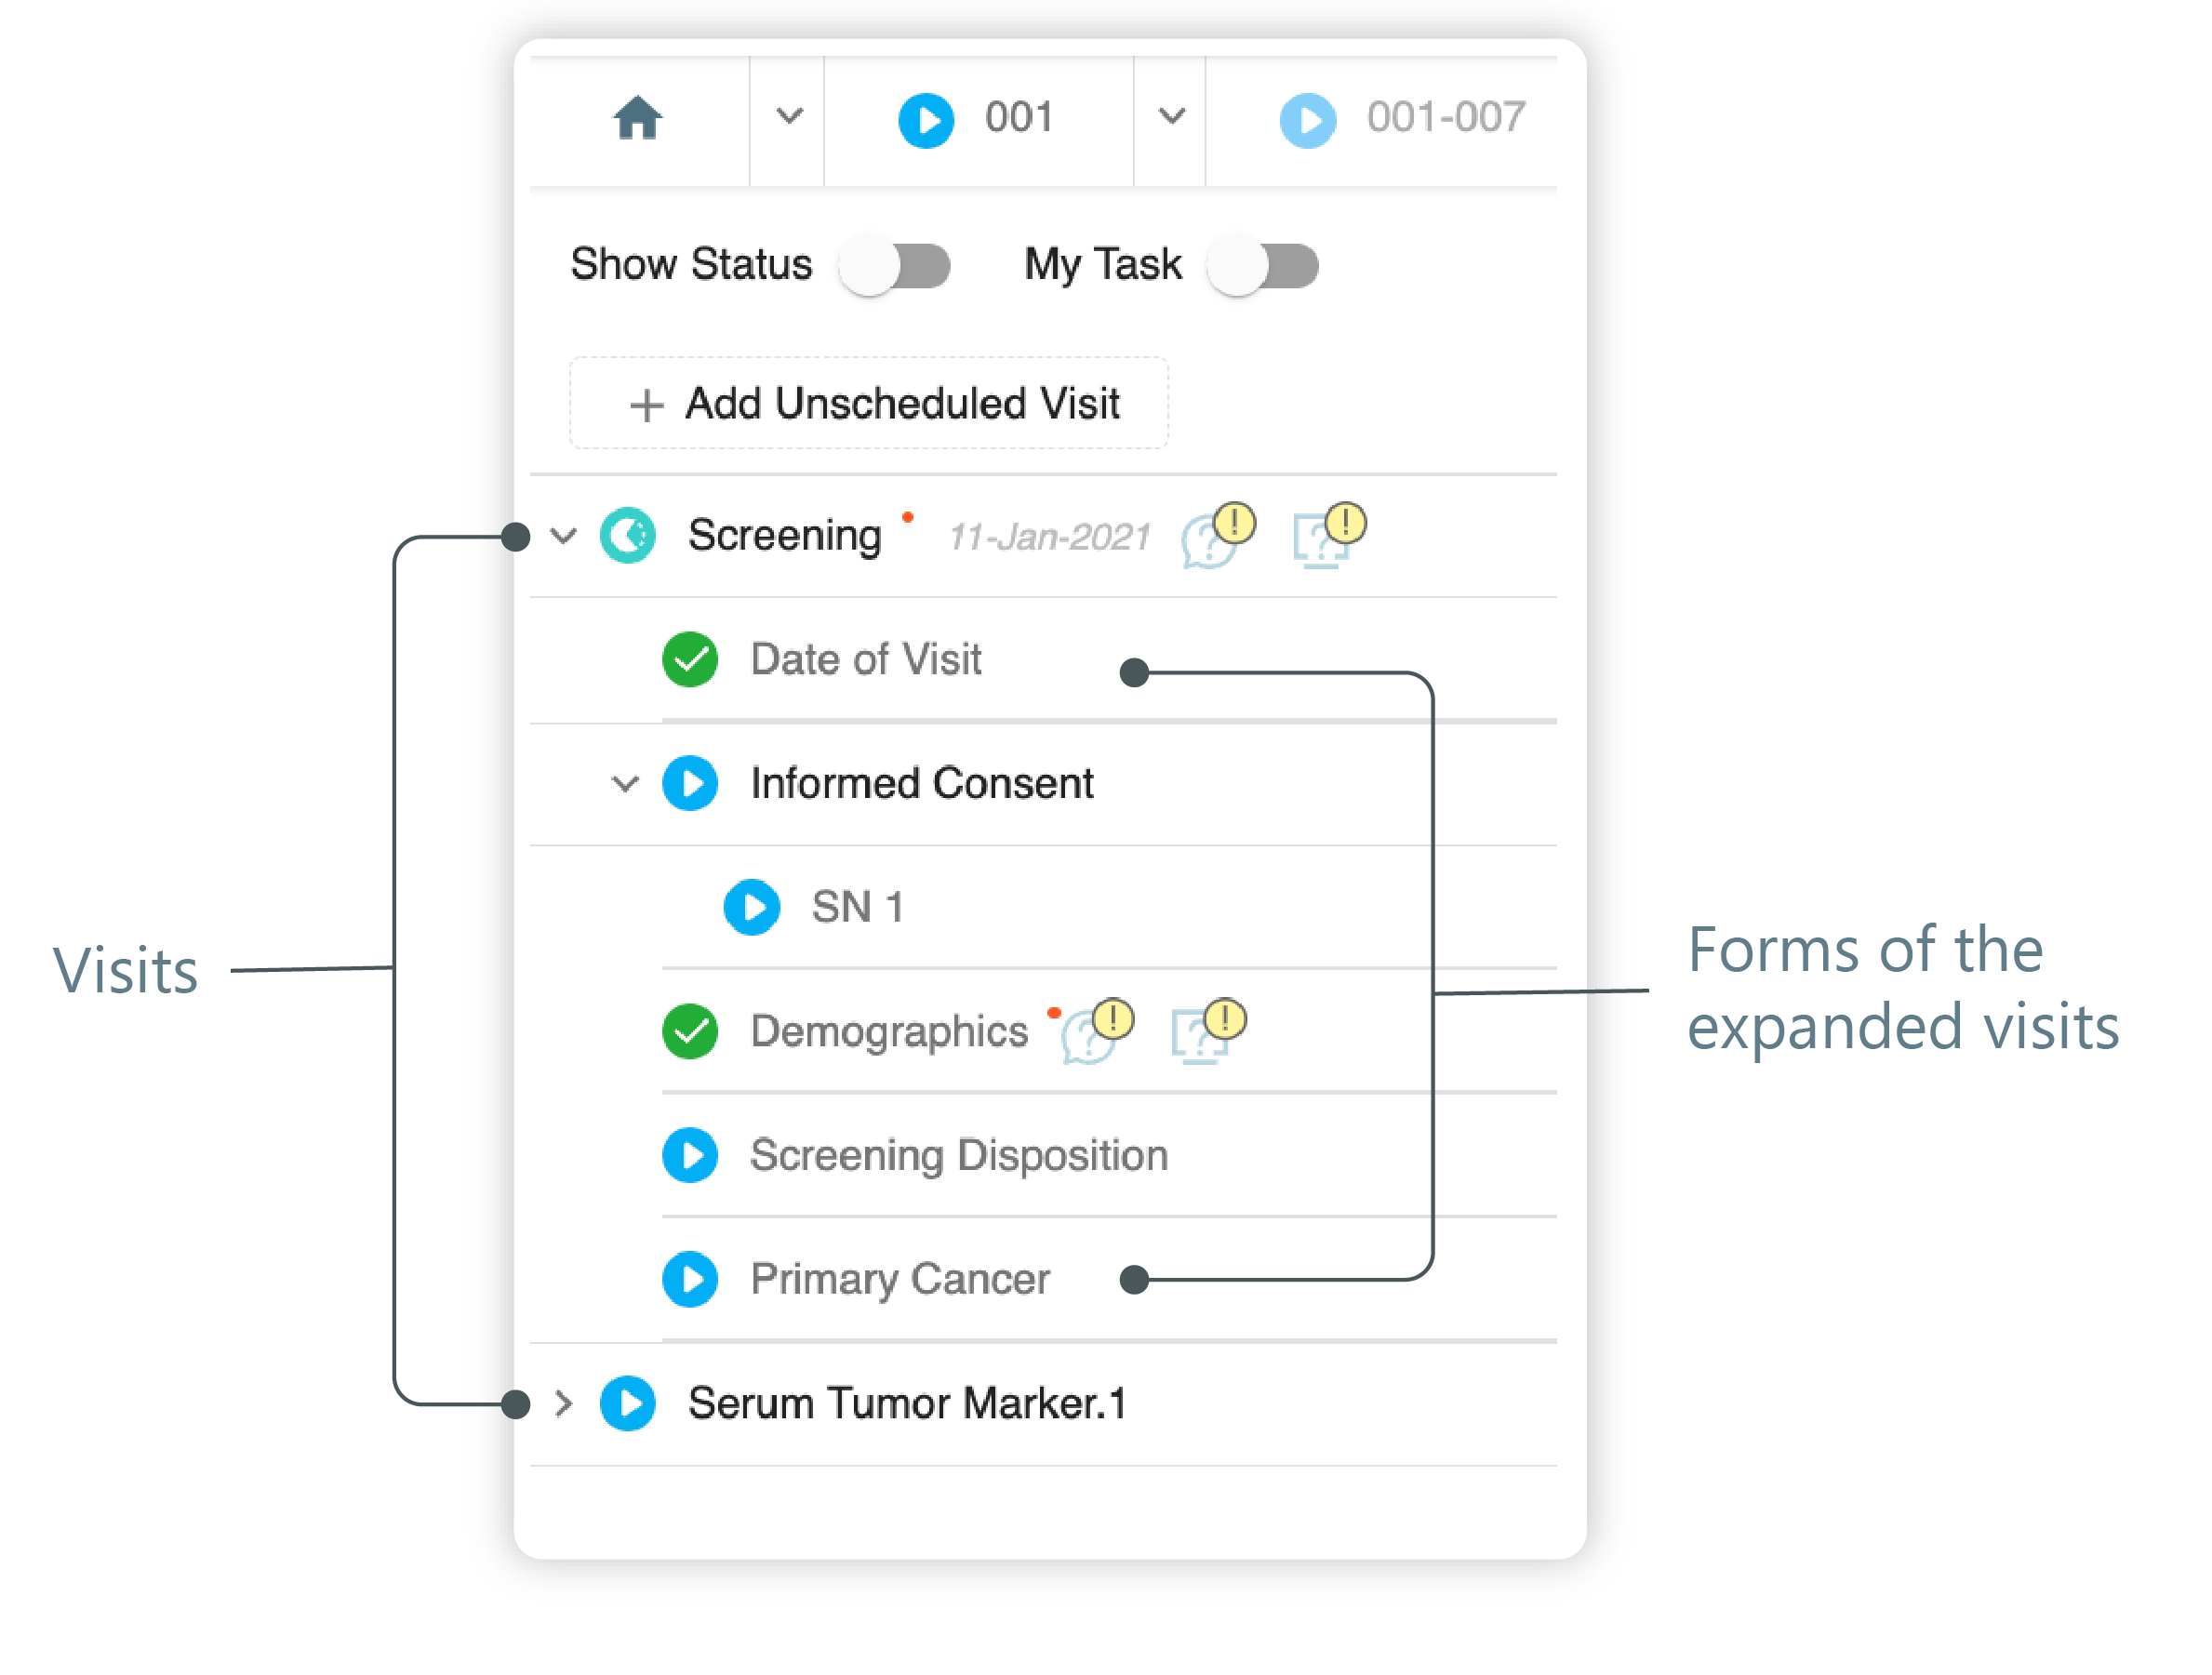 Figure 3. Left panel. Visits and their forms
-
Now access the form signature functionality in your preferred way as follows.
-
Select the form or an individual record of the log form that you want to sign or remove the signature.
-
In the contents panel that appears, from the workspace toolbar, select Sign
 to provide your
signature for the form that is not signed or select Unsign
to provide your
signature for the form that is not signed or select Unsign  to remove the signature from the previously signed form.
 Figure 4. Selecting option to sign form
-
From the toolbar of the visit and form panel, turn on the My Tasks toggle to see the actions you can perform with the visits, forms, and log form records.
-
Next to the form or form record of your interest, in the Sign
 column, select the checkbox to sign or clear
the checkbox to remove your signature.
column, select the checkbox to sign or clear
the checkbox to remove your signature.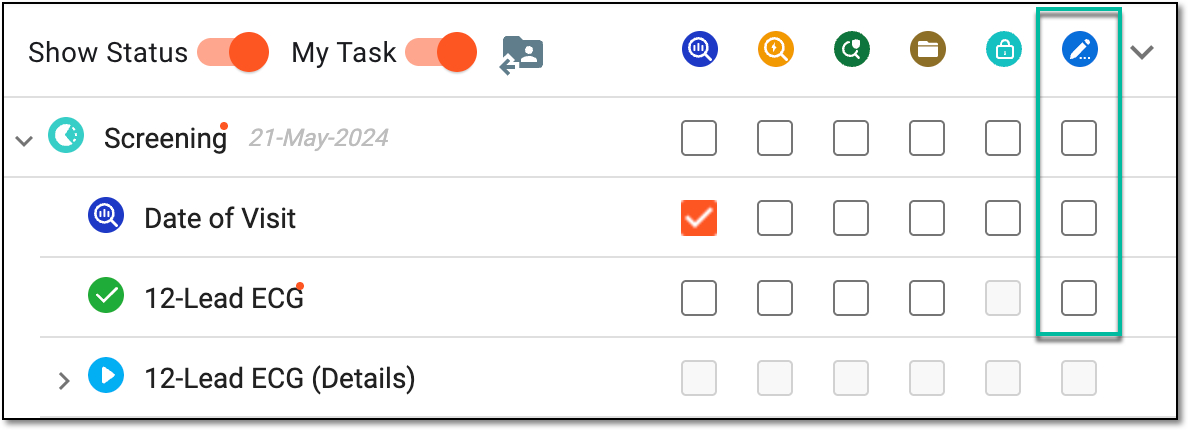 Figure 5. Signing form via task panel
-
-
In the Enter User Signing Password Information dialog appears, complete the fields as explained in the following table.
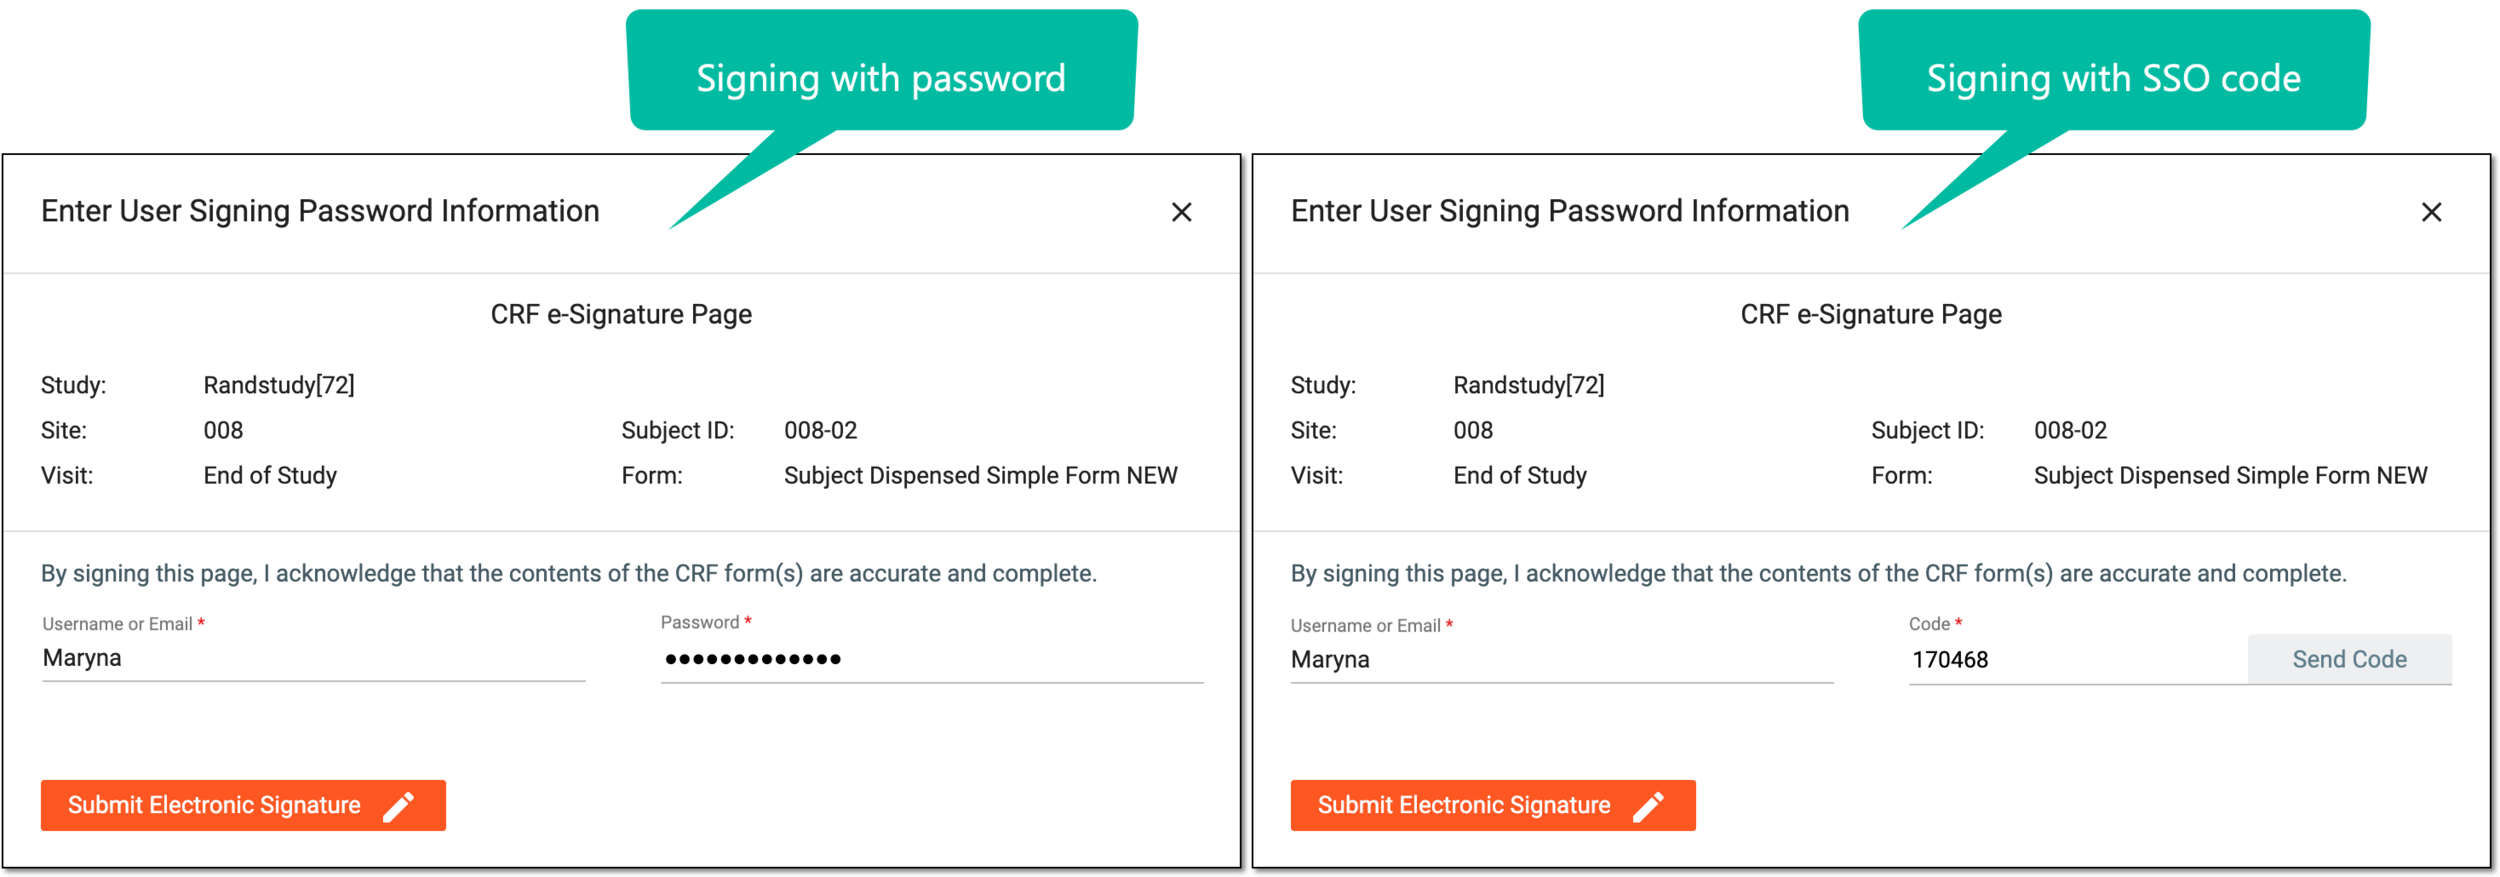 Figure 6. Entering signature credentials
Tip
In the following table, mandatory elements are marked with an asterisk (*).
Element
Details
Username or Email*
Enter your username or email that you use to log in to the eClinical applications.
Send Code
Select
 to send the temporary PIN code to your email for which the SSO method is configured.
The button is only available if you use the authorization method via SSO.Code*
Enter the temporary PIN code that you received via email.
The field is only available if you use the authorization method via SSO.Password*
Enter the password that you use to log in to the eClinical applications.
The field is only available if you use the authorization method by providing your login and password.Submit Electronic Signature
Select
 to confirm your action with your signature and save the implemented changes.
Select this icon to discard your action, close the dialog, and return to the Study Summary page.
Important
For security, the system logs you out after three failed attempts to confirm your identity with a password or code.
Once submitted, the entire form or its record (based on your selection) is signed or the signature is removed. For the signed instances, a unique signature hashcode is generated and can be reviewed along with the signature information at any time. Once all the records of the log form are signed, the log form itself becomes signed automatically.
View form signature information
In the EDC application, some CRFs might require the signature of the liable personnel, such as PI, to verify their complaince. Each time the form is signed a unique hashcode is autogenerated. This hashcode is used to ensure the unique identification of the data and can be viewed along with the signature information. You can view the detailed signature information along with its unique hashcode at any time.
Important
You can view the form signature identification only.
-
In the EDC application header, select the DATA ENTRY tab.
-
On the site list page that opens, select the tile representing the site with which you want to work.
Figure 1. Viewing site tile
-
In the Database ID column, select the ID of the subject to open their Visit Overview page and start working with visits and forms.
Figure 2. Selecting Database ID
-
On the Visit Overview page that opens, on the left, a panel with all subject visits is displayed. Expand the needed visit to open the forms associated with that visit.
Figure 3. Left panel. Visits and their forms
-
Select the form for which you want to view the hashcode signature.
-
On the page that opens from the contents panel, select View Signature
 .
. Figure 4. Selecting View Signature
-
In the View Signature dialog, observe the signature information along with its unique hashcode.
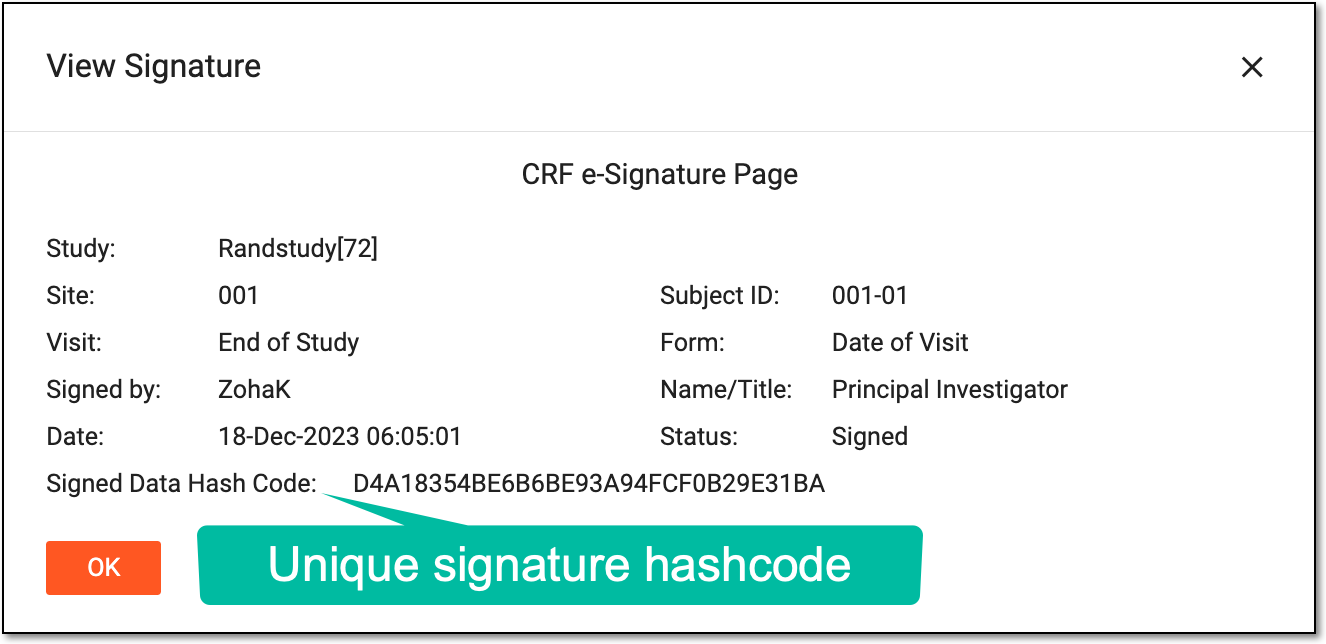 Figure 5. Viewing unique hashcode
You have viewed the signature information. Select  to close the dialog.