Lab normal range association with forms
In EDC, you can associate the CRF intended for the lab data entry with the respective lab normal range so that when the form is completed with the subject test results, the system can automatically compare them against the preset normal ranges and assess the result normality.
Since the normal ranges can have their effective dates, once the normal range expires, it is disassociated from the form automatically. With the Assign Lab Normal Range to Form functionality, you can track the form association status and associate the normal ranges to forms as needed.
For the system to properly assess the lab results normality for the subjects, you need the respective CRF to be associated with the normal ranges that are effective for the time of for completion and appropriate for the test in question.
-
In the EDC application header, select the STUDY INFO tab.
-
In the left pane, select Lab > Assign Lab Normal Range to Form.
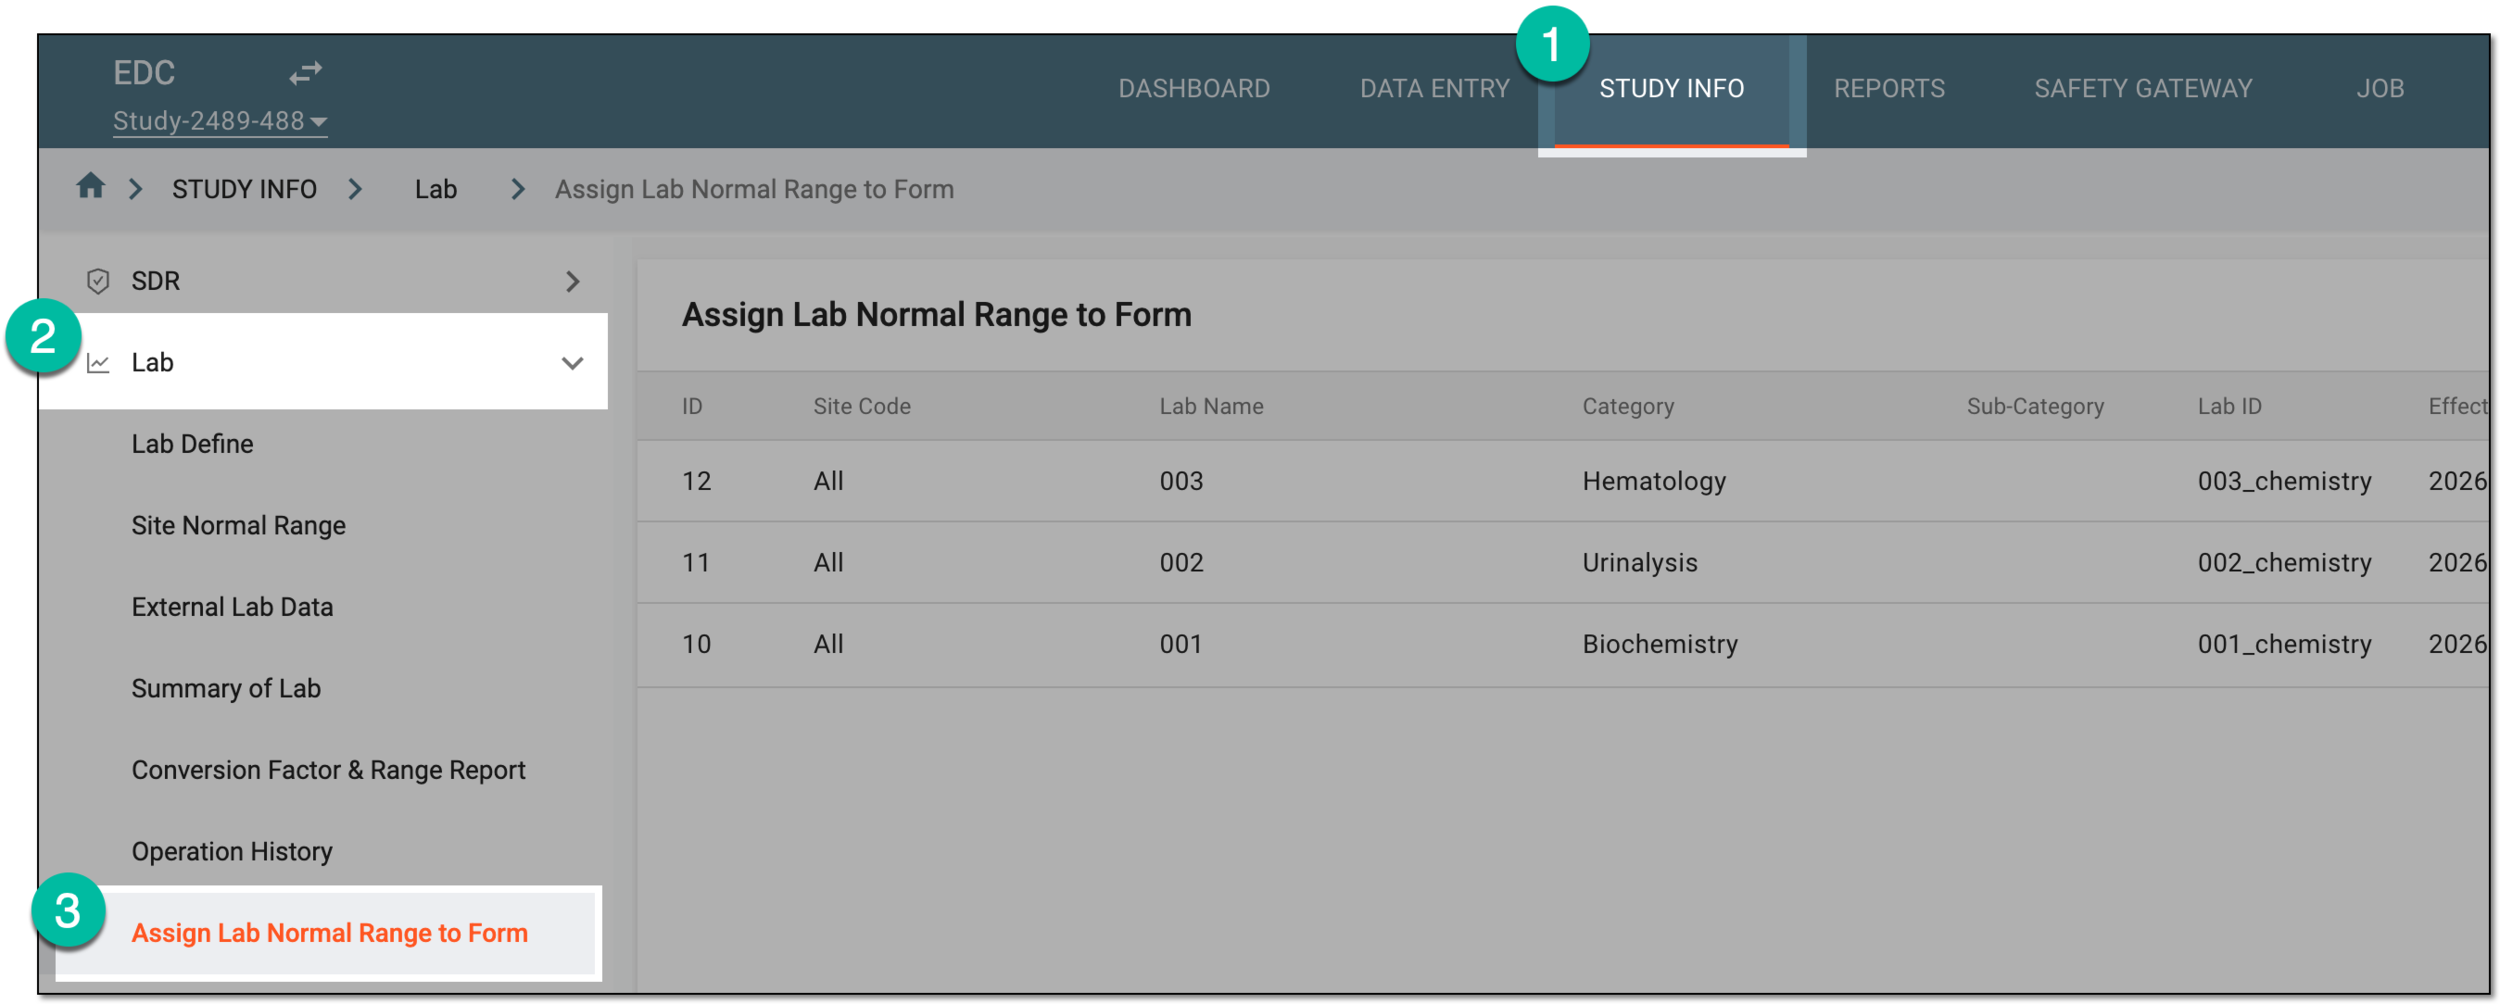 Figure 1. Accessing normal range association with forms
-
In the Assign Lab Normal Range to Form table that opens, locate the normal range that you need to associate to a form. Then in the Action column next to it, select Assign Lab Normal Range
 .
 Figure 2. Accessing normal range association
-
In the Assign Lab Normal Range dialog that appears, the forms available on the list satisfy the following requirements:
-
The form is active.
-
The form is not currently associated with any lab normal range.
-
The form is relevant for the selected lab category.
-
The form completion window matches the effective dates of the lab normal range.
Select the checkboxes next to the forms that you need to associate to the lab normal range. Then select
 .
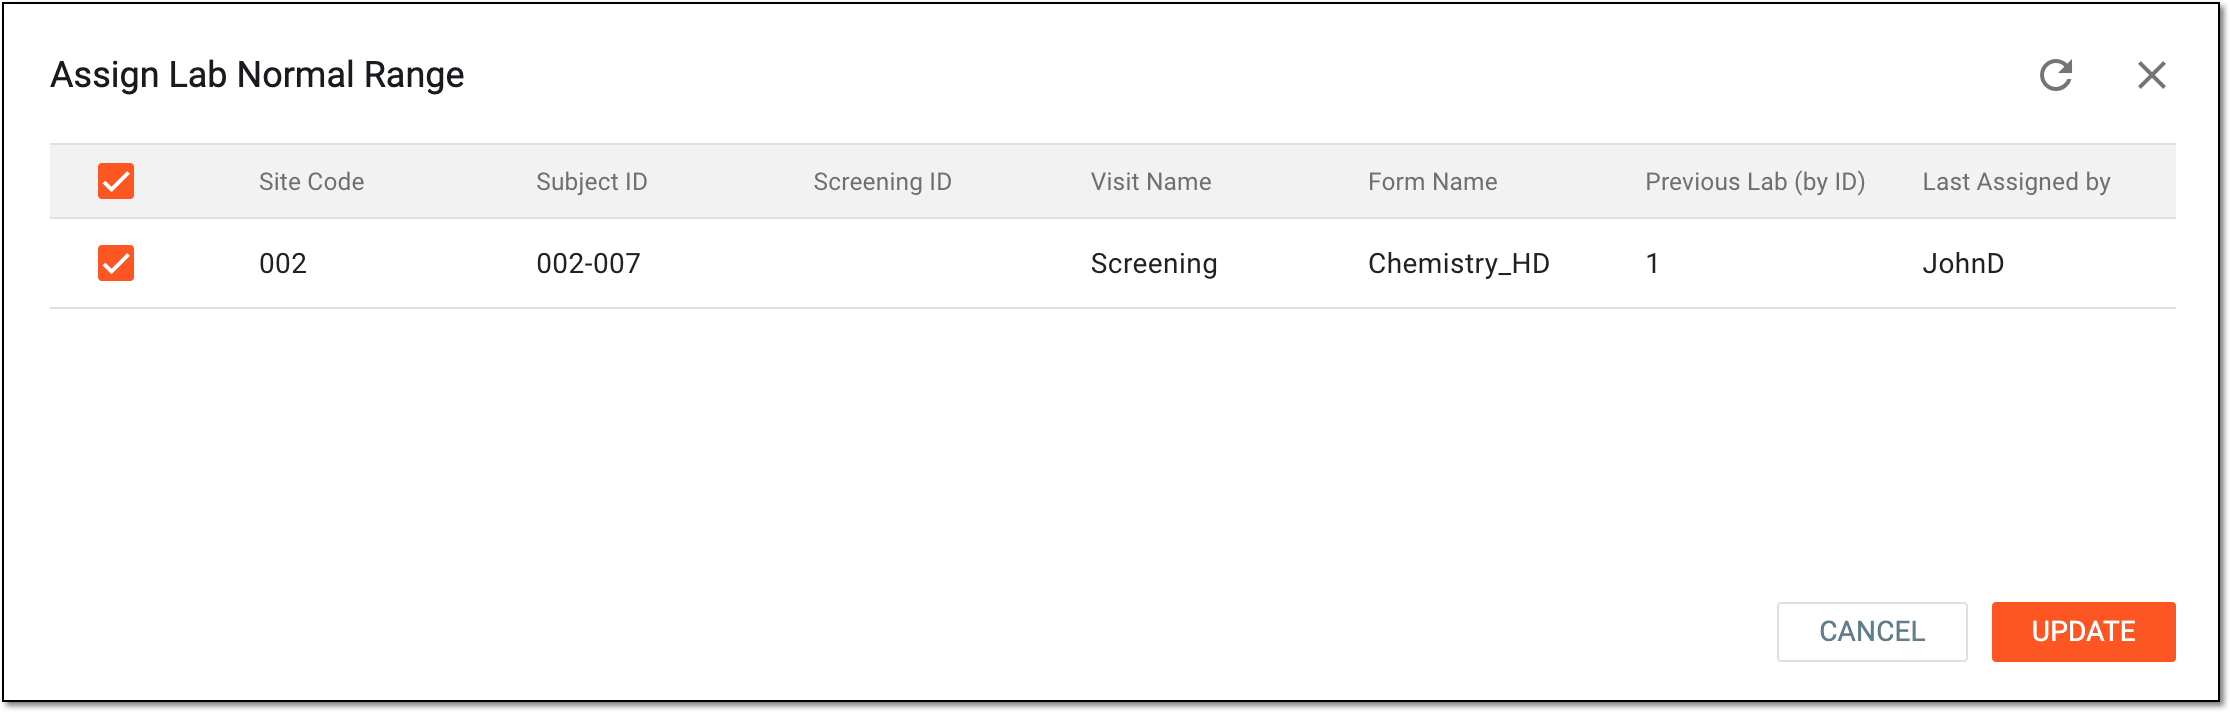 Figure 3. Assigning lab normal range to form
-
-
In the confirmation dialog that appears, select
 to acknowledge that the lab normal range will be assigned to all the selected forms.
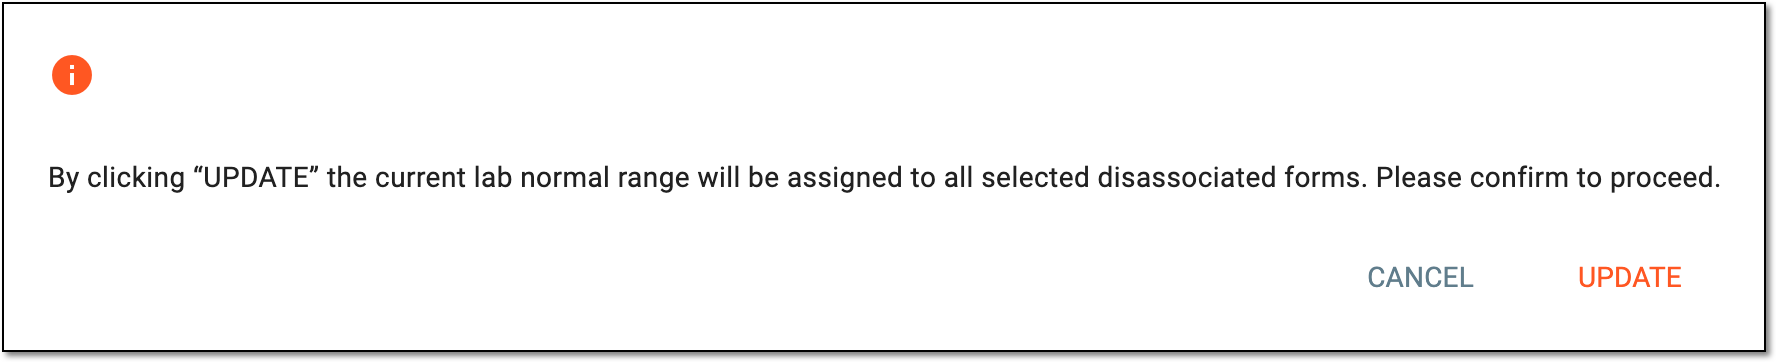 Figure 4. Confirming lab normal range assignment to form
Once confirmed, the lab normal range is associated with all the selected forms. When you open the respective form for the data entry, the associated lab is preselected automatically. You can check the status of the current and historical assignments when analyzing the association status for the lab normal range.
For the system to properly assess the lab results normality for the subjects, you need to associate the respective normal range wit the CRFs intended for lab data entry. The history of associations and their statuses you can analyze for each lab normal range individually.
-
In the EDC application header, select the STUDY INFO tab.
-
In the left pane, select Lab > Assign Lab Normal Range to Form.
Figure 1. Accessing normal range association with forms
-
In the Assign Lab Normal Range to Form table that opens, locate the normal range whose association status you want to analyze. Then in the Action column next to it, select Lab Assignment Status
 .
 Figure 2. Accessing lab assignment status details
-
In the Lab Assignment Status dialog that opens, analyze the records on the status of the association with forms.
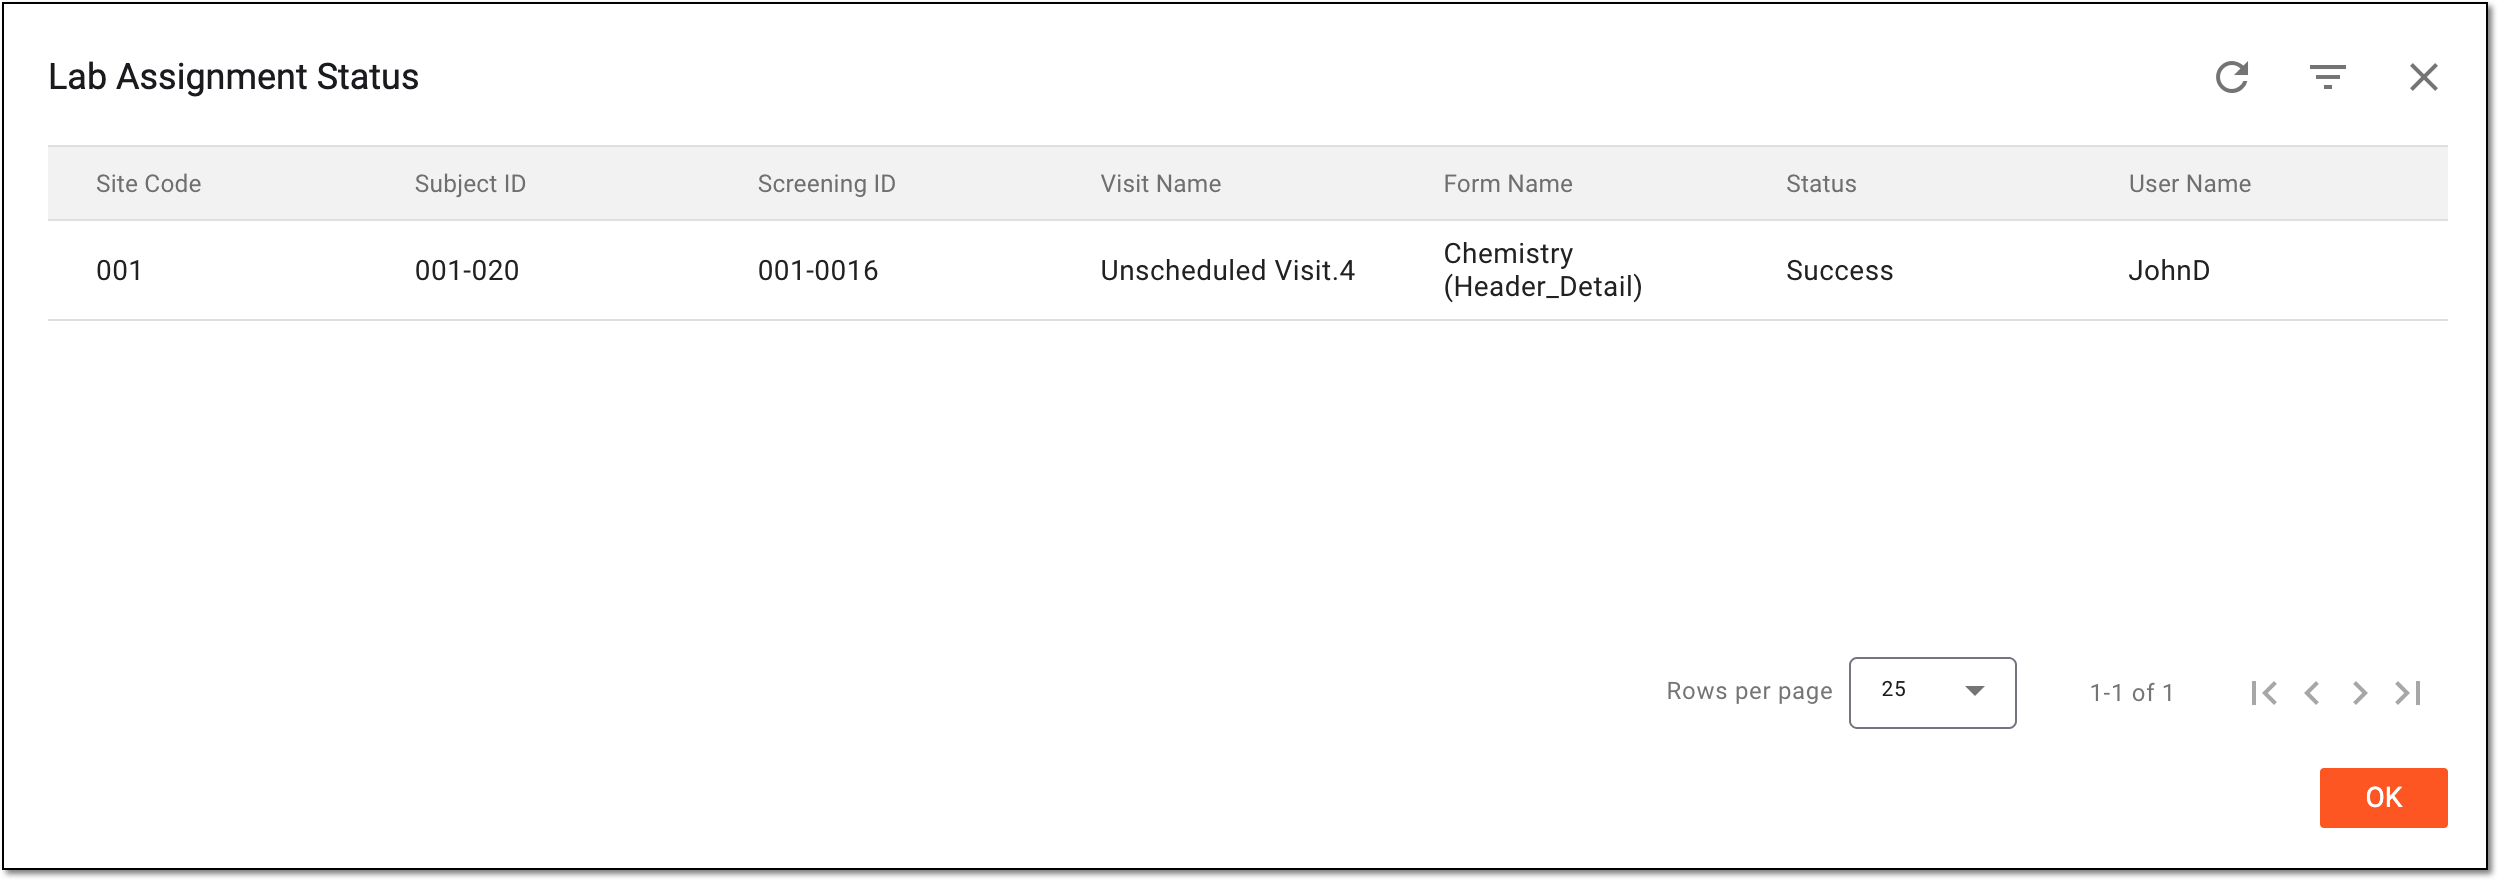 Figure 3. Analyzing lab assignment status history
You have analyzed the lab normal range association status history. Select  to close the dialog and return to the Assign Lab
Normal Range to Form page.